Skip to content


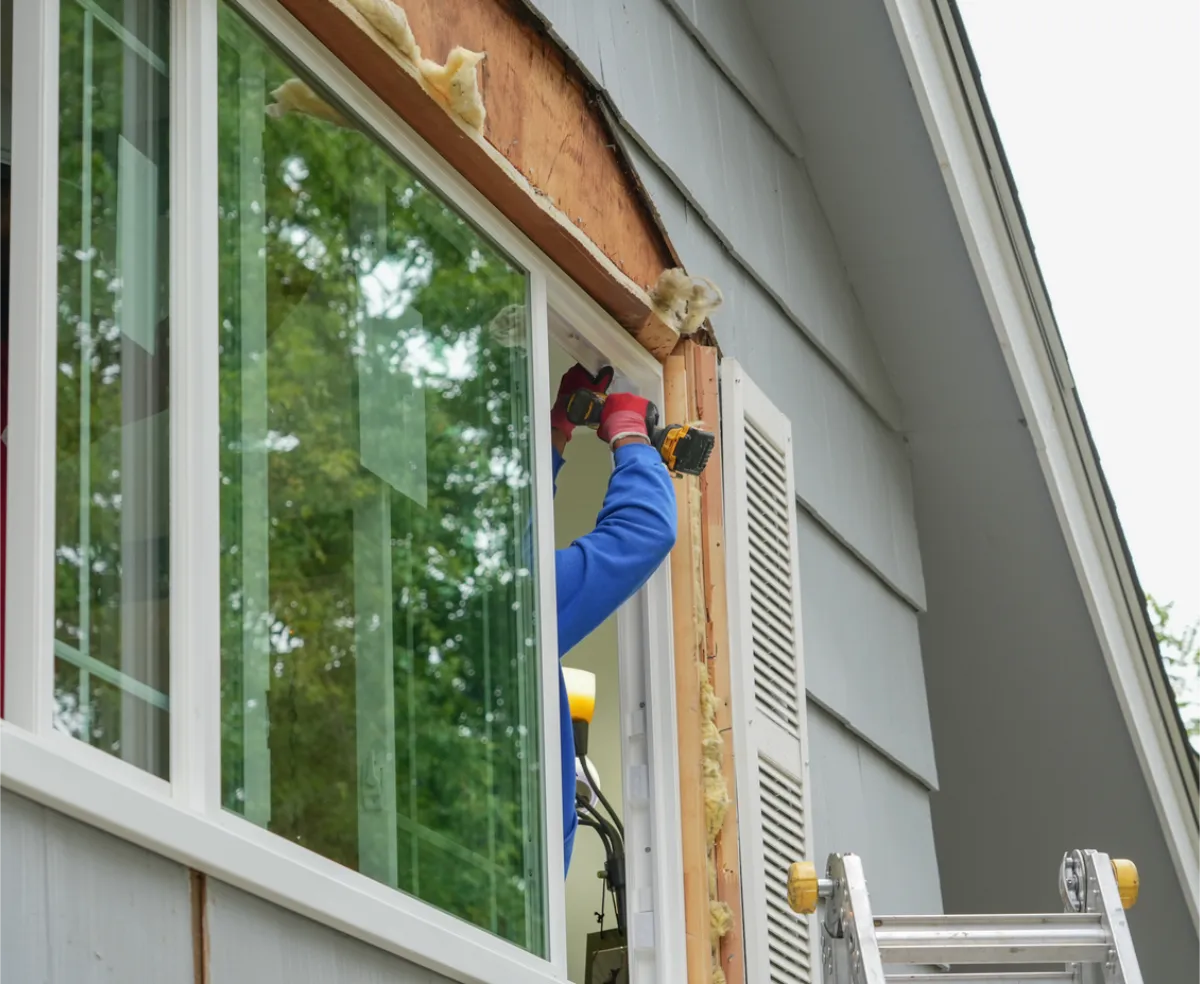
Professional window installation includes measuring the opening, removing the existing window, checking and preparing the opening, setting and securing the new unit, sealing and finishing around it, and testing the window before the job is complete.
Accurate measurements, a solid opening, and the way the window is set and sealed all affect how well it works and how long it lasts. That matters on Long Island, where homes range from older Capes and Colonials to ranches, split-levels, and newer construction. Existing openings may have original wood frames, previous replacement windows, aluminum capping, masonry, or layers of past renovation work that affect how the next window needs to be installed.
Unified Home Remodeling is a family-owned exterior remodeling company that has served New York homeowners since 1989.
A good installer checks those conditions before moving ahead. Measurements and project details are confirmed first, then the job moves through removal, prep, installation, sealing, finishing, and final testing.
Reviewed by Steven DiMare, CEO of Unified Home Remodeling, on August 29, 2026, based on the company’s experience with replacement-window projects on Long Island and throughout the greater New York area.
Quick Summary: What Happens During Window Installation?
- Once the contract is signed, a measure tech comes back to double-check measurements, go over the project with you, and do a final walkthrough.
- The crew removes the old window, either as a pocket or full-frame job, depending on what the project calls for.
- With the old window out, the crew checks the opening for damage, uneven framing, or signs of earlier window work.
- The new window goes in, gets leveled, squared, shimmed, and fastened.
- The crew insulates and seals around the frame.
- Interior and exterior trim or capping gets finished up based on the opening and installation method.
- Before leaving, the crew opens and closes the window, checks the locks, and makes sure everything works right.
What Homeowners Should Expect Before Installation Day
Window installation starts before anyone takes out a window. After the project is approved, the crew needs to confirm final measurements and details so the new windows actually fit the openings.
Once the contract is signed, a measure technician comes back out to double-check measurements, go over the project details, and do a final walkthrough with you.
That visit helps confirm window sizes and configurations while noting conditions the installation crew may need to plan for, such as unusual trim, masonry openings, limited exterior access, or previous window work.
The installation method can change based on the window brand and model, whether it’s a pocket or full-frame job, the type of opening, existing siding and trim, hidden damage, local codes, and what’s in the contract. Materials like foam, flashing, backer rod, capping, and fastening methods are picked for each project instead of using the same approach every time.
It helps to clear out the area around each window. Move curtains, blinds, furniture, and anything fragile out of the way so the crew has room to work. Keep pets out of the work zones too.
Removing the Existing Window

The first step on installation day is removing the old window, but how much of the existing assembly comes out depends on the type of replacement.
Pocket Window Removal
For a pocket install, the old sash and moving parts come out, but the current frame stays. The new window fits right inside that frame.
This method keeps a larger part of the original trim and finish work, as long as the old frame is still solid and dry.
Full-Frame Window Removal
A full-frame install takes out the whole window assembly down to the rough opening. This gives the crew direct access to the framing and may be needed when the existing frame can no longer stay in place.
Once the old window is removed, the crew may uncover damaged wood, water staining, old insulation, gaps, previous replacement frames, or repairs from earlier projects.
The crew removes only what’s needed for the installation, especially around existing trim, siding, brick, or stone. Full-frame jobs naturally open up more of the area, but the surrounding materials should still be protected as much as possible.
Inspecting and Preparing the Window Opening

Once the old window is out, the crew can see the real condition of the opening. Before the new window goes in, they check that the sill, framing, and surrounding materials are solid enough to support it and ready to be sealed.
Old caulk, loose insulation, debris, and material from earlier installs also need to be cleared out before the new window goes in.
What Installers Look for Around the Opening
Common issues include:
- Wood rot: Moisture around the old window can damage the sill, jambs, or nearby framing.
- Water staining: Staining around the opening can point to past leaks or moisture getting behind the window.
- Out-of-square framing: Older openings can shift over time and may need extra adjustment before the new window goes in.
- Previous window work: Old replacement frames, aluminum capping, caulk, or shims may need to be removed or corrected.
- Uneven sills: The bottom of the opening needs to be solid and even enough to support the new window.
- Masonry openings: Brick, block, and stone can change how the window is fastened, sealed, and finished.
You see these issues a lot in older Long Island homes. Capes, Colonials, ranches, and split-levels that have been updated over the years often have a mix of original construction and materials from past window, siding, or trim jobs.
What Happens if the Opening Has Damage?

Minor prep may include cleaning out the opening, removing old sealant or insulation, leveling small uneven areas, and replacing damaged material before the new window is installed.
More serious damage needs to be corrected before the project moves forward. These conditions can also affect the cost of a replacement window project if more prep or repair work is needed.
When concealed damage is found, the installers take pictures and send them to the office so the condition can be assessed. The homeowner is shown what was found, how it needs to be corrected, and whether the repair changes the cost or scope of the project. If additional work changes the project cost, the homeowner approves it before that work is performed.
The condition of the old frame also helps determine whether a pocket install is still an option. If too much of the existing frame needs to be removed or repaired, the installation approach may need to change.
How Tile or Stucco Can Change the Installation
Tile and stucco around an existing window can affect which direction the replacement needs to be installed from.
If exterior stucco runs over the window framing or opening, the window may need to be installed from inside. Sometimes extra wood filler is needed to keep the framing solid.
When interior tile extends over the window framing, the crew may need to install the replacement from the exterior so the existing tile is not damaged. These details need to be identified before deciding how the old window will come out and how the new one will go in.
Installing, Leveling, Shimming, and Securing the New Window
Once the opening is ready, the new window goes in and gets adjusted until it sits right. The crew checks that it’s level, straight, and square so the sash moves smoothly and the locks line up.
Shims go around the frame to make small adjustments and keep the window supported without twisting. Once it’s set, the window gets fastened the way the manufacturer requires.
If the frame gets pulled out of square, the window can stick, leave gaps, or be tough to lock.
Insulating, Sealing, and Protecting the Opening
Once the window is fastened, the crew insulates and seals around the frame.
They might use low-expansion foam, backer rod, sealant, or flashing, depending on the job. Too much foam can put pressure on the frame and affect how the window works.
On a full-frame install, the rough opening is exposed, so flashing and exterior sealing need to be done carefully. The idea is to keep water moving away from the opening instead of relying on caulk for everything.
Interior and Exterior Finishing

After the window is in and sealed, the crew finishes up both inside and out. How much work is needed depends on the install method and what came out with the old window.
Inside, they might reinstall or replace stops, trim, or jamb extensions. Outside, the crew could finish capping, trim, sill work, or sealant around siding, brick, or stone.
Pocket installs usually keep more of the original trim, while full-frame jobs may require more finishing around the opening.
Testing the Window Before the Crew Leaves
The last step is making sure the new window works the way it should.
The crew opens and closes the sash, checks the locks, makes sure the frame hasn’t shifted, and confirms screens and hardware fit right. On double-hung windows, both sashes should move smoothly.
They also look for gaps, missing sealant, or trim problems. A new window shouldn’t be hard to open, close, or lock on day one.
Pocket Installation vs. Full-Frame Installation

A pocket install puts the new window inside the old frame, so that frame has to be solid and square. It can preserve more of the existing trim when the frame is still in good condition.
A full-frame job removes the old window down to the rough opening and gives the crew access to the surrounding framing and wall materials. This may make sense when the existing frame cannot stay or the window size or style is changing.
Neither method is always better. The right call depends on the condition of the opening and how much of the old window can safely stay.
Changing the Window Style Without Changing the Opening

On one Long Island project, a homeowner wanted to replace an older bow window but did not want another bow. The opening stayed the same size, but three new windows were installed in its place: a picture window in the center with a double-hung window on each side.
In this type of setup, the picture window often takes up about half of the opening, while the two double-hung windows split the remaining space. The windows arrive as separate units for easier transportation and are joined together on site.
Issues That Can Make Window Installation More Complicated
Some conditions require extra planning or a different installation approach, especially in older Long Island homes.
Common complications include:
- plaster interiors that require more careful removal and finishing
- brick, block, stone, or other masonry around the opening
- changes in window size or style
- tile or stucco that overlaps the existing window framing
- lead-based paint in homes built before 1978
Moisture is another factor, especially in older homes near the South Shore or other coastal spots where years of wind and rain may have affected the materials around the window.
Lead Paint and Window Replacement in Older Homes
Window replacement can disturb painted surfaces in homes built before 1978. Depending on the property and scope of work, EPA Renovation, Repair and Painting requirements may apply when lead-based paint is present or presumed to be present.
Homeowners with an older home can review the EPA Renovation, Repair and Painting Program for more information.
Do You Need a Permit to Replace Windows?
Permit and code requirements are not the same for every window project. Requirements can vary by municipality, property type, project scope, window location, changes to the opening, and whether emergency escape and rescue requirements apply.
Homeowners are responsible for confirming whether a permit is required for their property before work begins.
What Separates a Good Window Installation From a Bad One?
A good install comes down to details you might not see once the trim is back on. The opening should be solid, the frame should sit level and square, and the window should be fastened, insulated, and sealed without forcing anything into place.
The window should open, close, and lock without a problem. Gaps, bowed areas, hardware that doesn’t line up, or a lot of caulk can mean the fit or installation is off. Problems like these are some of the window replacement pitfalls homeowners should watch for.
Proper installation matters for the manufacturer’s requirements too. Product warranties and workmanship aren’t the same, so the window still needs to be installed according to the manufacturer’s requirements.
How well the window is installed affects drafts, water leaks, operation, and how long the replacement window lasts.
Questions to Ask Before Hiring a Window Installer
Who performs the final measurements?
Final measurements should be handled by someone who understands the products being installed and what measurements are needed for the installation method. At Unified, a dedicated measure technician returns after the contract is signed to confirm the measurements and project details.
How is the installation method selected?
The installation method depends on the home, the dimensions and condition of the opening, the layout around the window, and the product being installed.
What happens if hidden damage is found?
Ask how the contractor handles damage that cannot be seen until the existing window is removed. The homeowner should be shown what was found and told how the contractor plans to correct it.
Will concealed damage be photographed and explained?
At Unified, concealed damage is photographed and sent to the office for review so it can be documented and explained to the homeowner.
Will I approve additional work before the cost changes?
If hidden damage or another condition changes the scope or cost of the job, additional work should be approved by the homeowner before it is performed.
What interior and exterior finishing is included?
Ask what happens to existing trim, capping, siding, masonry, jamb extensions, or other materials around the window so you know what is included in the contracted scope.
How are the windows tested after installation?
Each window should be tested for operation after installation. The crew should make sure it opens, closes, and locks correctly and check for visible gaps before the job is considered complete.
Get a Replacement Window Estimate From Unified Home Remodeling
Unified Home Remodeling can evaluate the condition of your existing window openings, explain pocket and full-frame installation options, review window and glass choices, and provide pricing based on the scope of the project.
Visit the Baldwin, Scarsdale, or Patchogue showroom to compare options in person. Call 888-631-2131 or fill out the online form to request a free estimate.
Frequently Asked Questions About Window Installation
How long does it take to install replacement windows?
Installation time depends on how many windows are being replaced, whether they are pocket or full-frame installations, and what the crew finds after the old windows come out. Extra repair, masonry, or finish work can add time to the project.
Do I need to leave my house during window installation?
Homeowners can often remain home during window installation, depending on the project and safety requirements. You may need to stay out of the rooms where the crew is actively working, and pets should be kept away from the work areas.
What happens if the installer finds rotted wood around the window?
The damaged area needs to be evaluated before the new window goes in. Small areas may require limited prep or replacement, while more extensive damage can require additional work around the opening.
Is a pocket installation or full-frame installation better?
Neither method is better for every home. Pocket installation keeps the existing frame when it is still in good condition. Full-frame installation removes the entire old window assembly and gives the crew access to the rough opening when more of the existing assembly needs to come out.
How can I tell if a replacement window was installed correctly?
The window should open, close, and lock without sticking or needing extra force. The frame should sit evenly in the opening, the hardware should line up, and there should not be obvious gaps, bowed areas, or excessive caulk around the window.